


SRAD with NEW AGE TAIL SECTION....


Registered User

Joined: Apr 2004
Posts: 37
From: Brunstucky` Oh

Re: SRAD with NEW AGE TAIL SECTION....
Originally Posted by bikerboy
It can be done. If you want instructions I can give them to you. This is someone elses bike and instructions for the record...
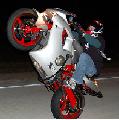




Registered User
Joined: Oct 2003
Posts: 420
From: Central Illinoizz
Re: SRAD with NEW AGE TAIL SECTION....
Originally Posted by jixxer0377
Hey bikerboy, so can it be done on a 03 gixxer with an 04 tail??? that I wanna see!


Registered User
Joined: Mar 2004
Posts: 72
From: rempdale,az
Re: SRAD with NEW AGE TAIL SECTION....
Originally Posted by verticaljay
I know that you can fit a ducati 748 front end on the front as well, I think that would be badass with both that tail section and the upper of a Duc.
Say whatttttttt.

Thread Starter
I Have Too Much Free Time

Joined: Jul 2003
Posts: 10,265
From: San Diego, Ca
Re: SRAD with NEW AGE TAIL SECTION....
Here's how you do it.....
This was done by a respectable Sneaky Gixxer on another site. This guy is good. He did it from scratch and made everything up as he went along..... If you post this somewhere else, at least give this man his credit.....
Here we go.........
Oh, and his site must not be working or?? as all the pictures showing what is being done alng side the words is not showing up. So use your imagination to see what the man means. Ok? Next, this guy is ordering a brand new upper. nce he gets it done he'll show us how to install that....
Ok, ready to learn it? Don't forget to give the man his credit if you post it somewhere else....
------------------------------
After many requests to know how to do the new gen. tail conversion I thought I would take the time to put this together.
You will need to purchase the following items:
Subframe
Trunk
Tail section plastic
Solo cowl/Passenger seat
Rider seat
Solo exhaust hanger or passenger pegs
Tail light or undertail
I bought all of my stuff from separate auctions on E-bay
First you need to cut and weld on the Subframe on the lower leggs.
Cut directly behind the factory weld where the factory tabs are welded. You must cut this as square as possible or when you weld back together it will be off. Mark each one from the side you removed it from. Then cut 1"3/8 from the subframe. Then reweld the tabs back on. You may need to have a shop do this for you, I was able to do this myself however.
Next you will then need to file the upper rails(leggs) of the subframe for it to clear the mainframe. File it so that when mounted with the two lower bolts the subframe will bolt up on the top two.
Now the subframe should be able to bolt on. This is the hardest and most important part of this mod.
Next fit the trunk. You will find that it hits the shock at the front of the trunk tray. You will need to cut this back untill it fits. I used a Air hack saw for the job, but a regular hacksaw will do just fine.
You will also need to cut the ear on the right side of the trunk tray even with the mainframe of the bike.
The trunk will mount just as factory for the given year. Except for the left side, this is where I suggest buying an undertail. It will hold the trunk in place better. Especially when doing stoppies or during a crash. Other wise dril a hole in the trunk on the left side and use a ZIP Tie to secure it to the upper rail of the subframe.
Next you will need to mount the trunk lock and latch.
The latch will mount right up. The lock is going to be a small challenge. You can get the one for the new gen bike, but yours will work also.
Go get what is called backstrap from your local car stereo store. Get the stiffer ones thay have, ones from lock actuator kits work the best. You will not believe how creative we would get with this stuff when I did car audio. Just as for a "backstrap" and now one will think you are crazy. You can use a similar material as well.
While at the stereo shop or at your local hardware store get a "speed clip" and apropriate screw. Slide the clip onto the strap over one hole on the end. This will screw down to the bottom of the trunk and loop around the lock and secure it in place in the hole of the trunk tray. You can try any other method you find, this was what I had on hand to accomplish the task.
I will upload a better photo of this later. You can barely see the screww and clip on the bottom.
Next step, you will need to get the battery and the electronics into the trunk. The battery is easy, however the relays and such are different on different years. The black box will mount in the slot where the rubberband is and will be held in place by it. Try to be as creative here as possible. The electronics need to be secure and not hit the seat when installed.
Just drill a hole in the above part and use the factory screws and mount. The screw will sit flush on the upper lip.
The tank now needs to be mounted. You need to modify the hinge to clear the battery. Cut the mount back with a hack saw to clear when put in the correct position. Use the two screws at the front of the tank to verify how far back to cut in the hinge. You can see in the photo how I cut it.
The very next step is critical. You must not get this off at all. You will need to put in 8mm by 1.25 threaded inserts for the tank hinge bolts to secure the tank to the subframe.
You need to drill the perfect size hole for these to sit down in. You will need compress these like a pop rivet. To do this you need the right bolt to thread into this and a larger nut to use as a spacer and appropiate size star washer. Put the bolt into the larger nut and then thread into the insert with the washer against the top flange of the insert. Thread until tight and insert into the hole. Now use a wrench to hold the larger nut and tighten the bolt. The insert shuld not turn, this is the use of the starwasher. It will stop the insert on the larger bolt. Tighten untill the insert is fully compressed like a pop rivet. If installed properly the insert will not rotate.
You now need to use the correct tap for the two bolt holes for the seat. Thread into them using the tap to cut into the insert you just installed. You will notice how close together these are. The bolts will hit the inserts when intalled for the seat so you need to clear them out. For the tank bolts get just short enough not to obstruct the bolts for the seat and visa versa.
--------------------------
WAS IT HELPFUL? I WAS JUST WAITING TO SEE HOW MANY FOLKS WANT TO SEE THE DIRECTIONS AND I GOT MORE THAN ENOUGH, SO I GAVE IT TO YOU....
LATER FELLAS...........
This was done by a respectable Sneaky Gixxer on another site. This guy is good. He did it from scratch and made everything up as he went along..... If you post this somewhere else, at least give this man his credit.....
Here we go.........
Oh, and his site must not be working or?? as all the pictures showing what is being done alng side the words is not showing up. So use your imagination to see what the man means. Ok? Next, this guy is ordering a brand new upper. nce he gets it done he'll show us how to install that....
Ok, ready to learn it? Don't forget to give the man his credit if you post it somewhere else....
------------------------------
After many requests to know how to do the new gen. tail conversion I thought I would take the time to put this together.
You will need to purchase the following items:
Subframe
Trunk
Tail section plastic
Solo cowl/Passenger seat
Rider seat
Solo exhaust hanger or passenger pegs
Tail light or undertail
I bought all of my stuff from separate auctions on E-bay
First you need to cut and weld on the Subframe on the lower leggs.
Cut directly behind the factory weld where the factory tabs are welded. You must cut this as square as possible or when you weld back together it will be off. Mark each one from the side you removed it from. Then cut 1"3/8 from the subframe. Then reweld the tabs back on. You may need to have a shop do this for you, I was able to do this myself however.
Next you will then need to file the upper rails(leggs) of the subframe for it to clear the mainframe. File it so that when mounted with the two lower bolts the subframe will bolt up on the top two.
Now the subframe should be able to bolt on. This is the hardest and most important part of this mod.
Next fit the trunk. You will find that it hits the shock at the front of the trunk tray. You will need to cut this back untill it fits. I used a Air hack saw for the job, but a regular hacksaw will do just fine.
You will also need to cut the ear on the right side of the trunk tray even with the mainframe of the bike.
The trunk will mount just as factory for the given year. Except for the left side, this is where I suggest buying an undertail. It will hold the trunk in place better. Especially when doing stoppies or during a crash. Other wise dril a hole in the trunk on the left side and use a ZIP Tie to secure it to the upper rail of the subframe.
Next you will need to mount the trunk lock and latch.
The latch will mount right up. The lock is going to be a small challenge. You can get the one for the new gen bike, but yours will work also.
Go get what is called backstrap from your local car stereo store. Get the stiffer ones thay have, ones from lock actuator kits work the best. You will not believe how creative we would get with this stuff when I did car audio. Just as for a "backstrap" and now one will think you are crazy. You can use a similar material as well.
While at the stereo shop or at your local hardware store get a "speed clip" and apropriate screw. Slide the clip onto the strap over one hole on the end. This will screw down to the bottom of the trunk and loop around the lock and secure it in place in the hole of the trunk tray. You can try any other method you find, this was what I had on hand to accomplish the task.
I will upload a better photo of this later. You can barely see the screww and clip on the bottom.
Next step, you will need to get the battery and the electronics into the trunk. The battery is easy, however the relays and such are different on different years. The black box will mount in the slot where the rubberband is and will be held in place by it. Try to be as creative here as possible. The electronics need to be secure and not hit the seat when installed.
Just drill a hole in the above part and use the factory screws and mount. The screw will sit flush on the upper lip.
The tank now needs to be mounted. You need to modify the hinge to clear the battery. Cut the mount back with a hack saw to clear when put in the correct position. Use the two screws at the front of the tank to verify how far back to cut in the hinge. You can see in the photo how I cut it.
The very next step is critical. You must not get this off at all. You will need to put in 8mm by 1.25 threaded inserts for the tank hinge bolts to secure the tank to the subframe.
You need to drill the perfect size hole for these to sit down in. You will need compress these like a pop rivet. To do this you need the right bolt to thread into this and a larger nut to use as a spacer and appropiate size star washer. Put the bolt into the larger nut and then thread into the insert with the washer against the top flange of the insert. Thread until tight and insert into the hole. Now use a wrench to hold the larger nut and tighten the bolt. The insert shuld not turn, this is the use of the starwasher. It will stop the insert on the larger bolt. Tighten untill the insert is fully compressed like a pop rivet. If installed properly the insert will not rotate.
You now need to use the correct tap for the two bolt holes for the seat. Thread into them using the tap to cut into the insert you just installed. You will notice how close together these are. The bolts will hit the inserts when intalled for the seat so you need to clear them out. For the tank bolts get just short enough not to obstruct the bolts for the seat and visa versa.
--------------------------
WAS IT HELPFUL? I WAS JUST WAITING TO SEE HOW MANY FOLKS WANT TO SEE THE DIRECTIONS AND I GOT MORE THAN ENOUGH, SO I GAVE IT TO YOU....
LATER FELLAS...........
Super-Thread-editor

Joined: Aug 2003
Posts: 7,327
From: Back in Indiana,(Muncie)
Re: SRAD with NEW AGE TAIL SECTION....
Originally Posted by ROCK~N~929
Thats a crime to paint that srad Kawi green!
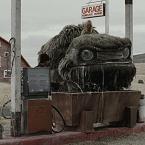
Guy across the street has a sport bike too. In the pic!
Guy across the street has a sport bike too. In the pic!
For the kawi green, it just puts the suzuki in it's proper place

Nah, looks


Registered User

Joined: Nov 2003
Posts: 1,486
From: Lonestar
Re: SRAD with NEW AGE TAIL SECTION....
Originally Posted by CruiserErik
How the hell you notice that when you looked at it
For the kawi green, it just puts the suzuki in it's proper place
Nah, looks
For the kawi green, it just puts the suzuki in it's proper place
Nah, looks

As far as the Muzzy rep. Suzuki..... Most srad owners are hardcore Suzuki fans and to paint it that color? Well to ea. his own. I do however like the body and work that has been done to it. BLUE/WHITE!!!!!!
Thread Starter
I Have Too Much Free Time
Joined: Jul 2003
Posts: 10,265
From: San Diego, Ca
Re: SRAD with NEW AGE TAIL SECTION....
Originally Posted by ROCK~N~929
lol.....I pay attention to detail. What really caught my eye was the weird **** in his yard.
As far as the Muzzy rep. Suzuki..... Most srad owners are hardcore Suzuki fans and to paint it that color? Well to ea. his own. I do however like the body and work that has been done to it. BLUE/WHITE!!!!!!
As far as the Muzzy rep. Suzuki..... Most srad owners are hardcore Suzuki fans and to paint it that color? Well to ea. his own. I do however like the body and work that has been done to it. BLUE/WHITE!!!!!!
what weird **** in his yard?
You can't even see his yard. You can the yard across the street and they have some weird grassy bushes...
What are you talking about...
Registered User
Joined: Nov 2003
Posts: 1,486
From: Lonestar
Re: SRAD with NEW AGE TAIL SECTION....
Originally Posted by bikerboy
what weird **** in his yard?
You can't even see his yard. You can the yard across the street and they have some weird grassy bushes...
What are you talking about...
You can't even see his yard. You can the yard across the street and they have some weird grassy bushes...
What are you talking about...

Thread Starter
I Have Too Much Free Time
Joined: Jul 2003
Posts: 10,265
From: San Diego, Ca
Re: SRAD with NEW AGE TAIL SECTION....
Originally Posted by ROCK~N~929
Thats what were talkin about, the yard across the street w/the sport bike out front. What caught my eye to the bike was the yard. I think that yard is busy w/strange bushes and lamps and one looks to have a ball on it. No biggie
I do see that bike across the street way in the back parked by the fence....
yeah, there is alot going on...

Registered User

Joined: May 2004
Posts: 3
From: Newcastle Upon Tyne
Re: SRAD with NEW AGE TAIL SECTION....
could sum1 email me the jpeg of the SRAD TAIL SECTION from the start of this thread please
JUST_KROOZIN@HOTMAIL.COM
thanks a lot
Ben (newbie with a 600 SRAD)
JUST_KROOZIN@HOTMAIL.COM
thanks a lot
Ben (newbie with a 600 SRAD)

