Stunt bike build (for noobs)
 09-17-2008, 06:30 PM
#1
�★ King of brake lines ★�

Thread Starter
Join Date: Jun 2008
Location: Croatia� ♥ ♥ ♣ ♠
Age: 34
Posts: 15,690


1. SICKINNOVATIONS
CRASH CAGES :
PRICES :
HONDA :
Honda 929 Cage : 219.99 USD
03-06 Honda 600RR Cage : SAME
2007 Honda 600RR Cage : SAME
Honda 900RR Cage : SAME
Honda 954 Cage : SAME
Honda F4/F4i Cage : SAME
Honda F2-F3 Cage : SAME
KAWASAKI :
03-04 Kawasaki 636 Cage : 219.99 USD
05-06 Kawasaki 636 Cage : SAME
00-02 Kawasaki Zx6 Cage : SAME
SUZUKI :
96-00 Suzuki Gsxr 600/750 Cage / Also fits 97-99 Gsxr 750 : 219.99 USD
01-03 Suzuki Gsxr 600 Cage / Also fits 00-03 750 : SAME
04-05 Suzuki Gsxr 600/750 Cage : SAME
06-07 Suzuki Gsxr 600/750 Cage : SAME
05-06 Suzuki Gsxr 1000 Cage : SAME
YAMAHA :
99-02 Yamaha R6 Cage : 219.99 USD
03-05 Yamaha R6 Cage : SAME
12 O CLOCK BARS :
HONDA :
99-00 Honda F4i 12 Bar - Black : 99.99 USD
01-02 Honda F4i 12 Bar - Black : SAME
93-99 Honda 900RR 12 Bar - Black : SAME
Honda 954 12 Bar - Black : SAME
Honda 929 12 Bar - Black : SAME
03-04 Honda 600RR 12 Bar - Black : 124.99 USD
KAWASAKI :
03-04 Kawasaki 636 12 Bar - Black : 99.99 USD
05-06 Kawasaki 636 12 Bar - Black : 99.99 USD
05-06 AC Farias 636 12 Bar - Black : 124.99 USD
OTHER PRODUCTS U CAN FIND : www.sickinnovations.com

2. POWERS STUNT WORKS :
CRASH CAGES :
PRICES :
299.00 + $34.00 (around)


OTHER PRODUCTS U CAN FIND : www.powersstuntworx.com
STUNT SPROCKETS :
gearing info :
What is Pitch?
Pitch is quite simply the thickness of the chain and sprockets. 520/525/530 520 being the thinnest and 530 being the thickest. 520 has the advantage of being lighter weight and increasing performance just from the loss of rotating mass. However, the thinner profile does have a shorter life expectancy than a thicker 525 or 530. Likewise, 530 provides a stronger, longer life expectancy but can increase rotating mass. Generally 600�s will use 520 or 525 while 1000�s will use 530.
Where do I start?
We recommend anybody looking to run larger sprockets starts with the back. Down -1 tooth in the front is roughly equal to +3 in the back. Also, anytime more than one or two teeth are added in the back a new chain will be required to fit. For this reason it is generally easier to start gearing with the back. Pick a rear sprocket and chain that will fit your riding style. As you progress or decide to change your gearing it is much easier to change the front sprocket to accommodate. This eliminates the need for new costly rear sprockets and chains. (Ex. Adding +3 to the gearing can be accomplished for $15 with a -1 front sprocket vs. a +3 rear sprocket and new chain.)
What gearing is right for me?
+5 � Provides a good place to start for anybody looking to get a little more into the stunts without sacrificing street riding or too much top speed. Will gain some torque/acceleration while losing roughly 10% of top speed.
+10 - Provides good amounts of power for slower wheelies while still having decent street riding. Will gain good torque/acceleration while losing roughly 20% of top speed.
+15 � Provides great power for technical slow wheelies. Street riding will be reduced to moderation in the city limits. No highways. Will gain great torque/acceleration while losing roughly 30% of top speed.
+20 - Provides huge power for anything and everything technical. Street riding will be reduced to just parking lots. Not for beginners. Will gain huge torque/acceleration while losing roughly 40% of top speed.
+25 or bigger � Ridiculous� but fun. Go big.
handbrake kits : (must be radial cilicder)
www.magura.com
www.fullthrottleinc.net
also u can buy and other cages / stunt pasts (other brands)
www.freestyleingenuity.com
www.racing905.com
www.tygersharkcages.com
AND ONE TIP SUBCAGE MUST BE OMR (for more info contact OLD MAN ROGGER)

CRASH CAGES :
PRICES :
HONDA :
Honda 929 Cage : 219.99 USD
03-06 Honda 600RR Cage : SAME
2007 Honda 600RR Cage : SAME
Honda 900RR Cage : SAME
Honda 954 Cage : SAME
Honda F4/F4i Cage : SAME
Honda F2-F3 Cage : SAME
KAWASAKI :
03-04 Kawasaki 636 Cage : 219.99 USD
05-06 Kawasaki 636 Cage : SAME
00-02 Kawasaki Zx6 Cage : SAME
SUZUKI :
96-00 Suzuki Gsxr 600/750 Cage / Also fits 97-99 Gsxr 750 : 219.99 USD
01-03 Suzuki Gsxr 600 Cage / Also fits 00-03 750 : SAME
04-05 Suzuki Gsxr 600/750 Cage : SAME
06-07 Suzuki Gsxr 600/750 Cage : SAME
05-06 Suzuki Gsxr 1000 Cage : SAME
YAMAHA :
99-02 Yamaha R6 Cage : 219.99 USD
03-05 Yamaha R6 Cage : SAME
12 O CLOCK BARS :
HONDA :
99-00 Honda F4i 12 Bar - Black : 99.99 USD
01-02 Honda F4i 12 Bar - Black : SAME
93-99 Honda 900RR 12 Bar - Black : SAME
Honda 954 12 Bar - Black : SAME
Honda 929 12 Bar - Black : SAME
03-04 Honda 600RR 12 Bar - Black : 124.99 USD
KAWASAKI :
03-04 Kawasaki 636 12 Bar - Black : 99.99 USD
05-06 Kawasaki 636 12 Bar - Black : 99.99 USD
05-06 AC Farias 636 12 Bar - Black : 124.99 USD
OTHER PRODUCTS U CAN FIND : www.sickinnovations.com
2. POWERS STUNT WORKS :
CRASH CAGES :
PRICES :
299.00 + $34.00 (around)
OTHER PRODUCTS U CAN FIND : www.powersstuntworx.com
STUNT SPROCKETS :
gearing info :
What is Pitch?
Pitch is quite simply the thickness of the chain and sprockets. 520/525/530 520 being the thinnest and 530 being the thickest. 520 has the advantage of being lighter weight and increasing performance just from the loss of rotating mass. However, the thinner profile does have a shorter life expectancy than a thicker 525 or 530. Likewise, 530 provides a stronger, longer life expectancy but can increase rotating mass. Generally 600�s will use 520 or 525 while 1000�s will use 530.
Where do I start?
We recommend anybody looking to run larger sprockets starts with the back. Down -1 tooth in the front is roughly equal to +3 in the back. Also, anytime more than one or two teeth are added in the back a new chain will be required to fit. For this reason it is generally easier to start gearing with the back. Pick a rear sprocket and chain that will fit your riding style. As you progress or decide to change your gearing it is much easier to change the front sprocket to accommodate. This eliminates the need for new costly rear sprockets and chains. (Ex. Adding +3 to the gearing can be accomplished for $15 with a -1 front sprocket vs. a +3 rear sprocket and new chain.)
What gearing is right for me?
+5 � Provides a good place to start for anybody looking to get a little more into the stunts without sacrificing street riding or too much top speed. Will gain some torque/acceleration while losing roughly 10% of top speed.
+10 - Provides good amounts of power for slower wheelies while still having decent street riding. Will gain good torque/acceleration while losing roughly 20% of top speed.
+15 � Provides great power for technical slow wheelies. Street riding will be reduced to moderation in the city limits. No highways. Will gain great torque/acceleration while losing roughly 30% of top speed.
+20 - Provides huge power for anything and everything technical. Street riding will be reduced to just parking lots. Not for beginners. Will gain huge torque/acceleration while losing roughly 40% of top speed.
+25 or bigger � Ridiculous� but fun. Go big.
handbrake kits : (must be radial cilicder)
www.magura.com
www.fullthrottleinc.net
also u can buy and other cages / stunt pasts (other brands)
www.freestyleingenuity.com
www.racing905.com
www.tygersharkcages.com
AND ONE TIP SUBCAGE MUST BE OMR (for more info contact OLD MAN ROGGER)
 09-17-2008, 06:56 PM
#3
�★ King of brake lines ★�
Thread Starter
Join Date: Jun 2008
Location: Croatia� ♥ ♥ ♣ ♠
Age: 34
Posts: 15,690
Re: Stunt bike build (for noobs)
OMR SUBCAGE (S)
OMR SUBCAGES available:
Honda
pay pal accepted
Tech
The original folding peg subcage


OMR SUBCAGES available:
Honda
- CBR F4i - 01, 02, 03 will also fit the single seat style with minor mods
- CBR 954- all years
- CBR 929- all years
- CBR 600RR - 03 , 04 , 05 , 06 , 07 <<< click here
- GSXR 600/750 -00, 01, 02, 03, 04, 05
- GSXR 1000 -01, 02, 03, 04
- R6 - 03, 04, 05 <<< click here
- R6s (old body style) - 06, 07, 08
pay pal accepted
Tech
- The 03-06 CBR 600RR , 03-05 Yamaha R6 ,03 04 gsxr 1000 and the f4i pegs are lowered and moved back and out for better peg position!
- The 01-03 GSXR 600 and 750 have the pegs moved out two inches because of the big tail section
- THE 07 600RR pegs are located 2-1/2 inches lower and 3 inches wider (Than stock)
- All other omr subframe cage models are in the stock location except they are rotated on their axis so they don't fold up unless you fold them up, this also puts your foot on the grippy part of the peg during a wheelie.
- omr subcages are available for all makes and models but only the ones listed above are available for shipping
The original folding peg subcage
09-17-2008, 07:17 PM
#4
�★ King of brake lines ★�
Thread Starter
Join Date: Jun 2008
Location: Croatia� ♥ ♥ ♣ ♠
Age: 34
Posts: 15,690
Re: Stunt bike build (for noobs)
USEFULL LINKS :
http://www.haibikeshop.com/ - bike shop (here u can find all stunt parts)
www.vortexracing.com - sprockets and chains
www.thrustcompany.com -sprockets and chains
www.hoheydesigns.com - here you can find dual caliper brackets
about dual caliper bracket :
OEM style dual caliper brackets used for off road motorcycle freestyle �stunt riding�. Machined out of aircraft grade weld able 6061 aluminum, not cheap quality by far. Don�t bother welding two cast aluminum brackets together because if you know anything about cast aluminum it�s cheap and not very weld able as far as strength or safety. Not reliable. You will need a 75� brake line if your running MX (dirt bike style) handlebars or at least a 66� brake line if you have stock clip on�s. Brackets are designs to operate using bike specific rear calipers. Note, on certain model motorcycles such as the 05-07 model 636�s we recommend using a 80� line if you have MX bars. We recommend that you measure the distance from your hand brake master cylinder to the very back edge of your swingarm to be certain of line length. These brackets are precisionaly machined and will easily last a lifetime.


 09-17-2008, 08:24 PM
#6
�★ King of brake lines ★�
Thread Starter
Join Date: Jun 2008
Location: Croatia� ♥ ♥ ♣ ♠
Age: 34
Posts: 15,690
Re: Stunt bike build (for noobs)
SOMETHING ABOUT BRAKE FLUID :
The function of brake fluid is to provide an incompressible medium to transmit the driver�s foot pressure on the brake pedal through the master cylinder(s) to the calipers in order to clamp the friction material against the discs. The foot pressure is multiplied by the mechanical pedal ratio and the hydraulic ratio of the master cylinders, booster (if used) and caliper piston(s).
This is a simple concept. When fresh, all brake fluids are virtually incompressible and the system works as well as its mechanical and hydraulic design allows. There are, however significant problems. Overheated brake fluid can (and will) boil in the caliper. Boiling produces gas bubbles within any boiling fluid. Gas is compressible so boiling brake fluid leads to a �soft� brake pedal with long travel. In extreme cases overheated brake fluid necessitates �pumping the brake pedal� in order to get a pedal at all.
so you need to change stock brake fluid,and buy some brake fluid with high boiling point!
brake fluids :
Brake Fluid
Dry Boiling Point
Wet Boiling Point
Suggested List Price
AP SUPER 600590�F410�F$18.00/16.9oz. .CASTROL SRF590�F518�F$69.99/33.8oz.NEO SUPER DOT 610610�F421�F$15.00/12oz. MOTUL RACING 600593�F420�F$15.00/16.9oz.MOTUL DOT 5.1509�F365�F$6.50/16.9oz.ATE SUPER BLUE536�F392�F$11.99/33.8ozVALVOLINE SYNPOWER503�F343�F$4.97/16.9oz.ATE SL500�F329�F$7.95/16.9oz.CASTROL LMA450�F311�F$3.50/16.9oz. AP 551528�F288�F$12.50/16.9oz.
i like this :
Brembo Racing - LCF 600+ Brake Fluid (04.8164.11)
Brembo LCF 600+ has been specifically formulated to provide the highest performance under all racing conditions. It has an independently proven low compressibility at high temperatures.This fluid is used by the world�s best including Moto GP teams Ducati and Honda and Formula 1 team Ferrari amongst many other world and national teams.
Compared to other leading brake fluids (AP600 and CastrolSRF) the Brembo Fluid is designed to give more than;
- 10% reduction in compressibility at 180�C.
- Highest dry boiling point at 316�C (601�F).
- Wet boiling point at 204�C (399�F).
- Brembo LCF600+ is compatible with other high performance DOT 3 and DOT 4 racing brake fluids.
- 500ml bottle.
09-17-2008, 08:33 PM
#7
�★ King of brake lines ★�
Thread Starter
Join Date: Jun 2008
Location: Croatia� ♥ ♥ ♣ ♠
Age: 34
Posts: 15,690
Re: Stunt bike build (for noobs)
BRAKE FLUIDS No 2 :
Pressure bleeding do's and don'ts
Pressure bleeding on its own is not necessarily a bad thing, but there are several steps one must take to ensure that the bleed event will result in an air-free brake system.
When we talk about pressure bleeding, we are referring to the process in which we pour our brake fluid into a pressure vessel, hook up a pressure source, and run the now pressurized fluid directly into the master cylinder reservoir. One by one the caliper bleeder screws are opened to allow the pressurized fluid to flow through the system until all of the old fluid has been purged. Simple, right?
Well yes, but beware of imitations � not all pressure bleeders are created equal. The professional units (the type you can consider using) separate the pressurized brake fluid from the pressure source (air) using a flexible rubber diaphragm. In this fashion, the pressurized air is kept from forcing its way into the fluid. As we all know, air and fluid should be kept as far apart as possible.
This brings us to the imitations. There seem to be a rash of products available lately that claim to be pressure brake bleeders at a fraction of the cost of the professional units. Like most things that sound too good to be true, well, it�s exactly that.
Like the professional units, these imitations contain a pressure vessel into which new brake fluid is poured. However, in order to pressurize the fluid, an integral pump handle is cycled to build the pressure inside the vessel without any measures taken to separate the pressurized air from the fluid. For those of you who have ever bought a $19.95 do-it-yourself potted plant and bug sprayer from Home Depot you get the idea.
Of course, having pressurized air in contact with the brake fluid will certainly force the fluid through the system just as effectively as the high-zoot professional unit, but as an added bonus we are stuffing air into the brake fluid at the same time. Talk about an unwanted surprise!
While it may not be visible to the naked eye (air can actually entrain itself in the fluid as to be visually undetectable) it�s there right along with all of the nasty moisture trapped inside of it. This of course begs the question: if you are stuffing air and water contaminated fluid into your brake system, why even bother bleeding it in the first place?
Naturally there will be those who argue that the amount of air in question is not important enough to worry about, but think about this for a moment: nearly every automotive manufacturer stores their bulk brake fluid in large containers which are subjected to a constant VACUUM. Talk about an expensive process! If just storing your fluid under regular atmospheric conditions isn�t good enough to keep air and water out, just imagine what shoving 30psi worth of compressed air on top of it is doing.
09-17-2008, 08:34 PM
#8
�★ King of brake lines ★�
Thread Starter
Join Date: Jun 2008
Location: Croatia� ♥ ♥ ♣ ♠
Age: 34
Posts: 15,690
Re: Stunt bike build (for noobs)
ABOUT BRAKE FLUIDS No3 (boiling points) :
BRAKE FLUID : DRY POINT : WET BOILING POINT :
AP SUPER 600 590 F 410 F
CASTROL SRF 590 F 518 F
NEO SUPER DOT 610 610 F 421 F
MOTUL RACING 600 593 F 420 F
MOTUL DOT 5.1 509 F 365 F
ATE SUPER BLUE 536 F 392 F
VALVOLINE 503 F 343 F
SYNPOWER 503 F 329 F
ATE SL 500 F 311 F
CASTROL LMA 450 F 288 F
AP 551 528 F 374 F
Last edited by Juca; 09-17-2008 at 08:47 PM. Reason: becouse i fucked up!
09-17-2008, 08:52 PM
#9
�★ King of brake lines ★�
Thread Starter
Join Date: Jun 2008
Location: Croatia� ♥ ♥ ♣ ♠
Age: 34
Posts: 15,690
Re: Stunt bike build (for noobs)
Man i fucked up this **** AGAIN!!! ( boiling points )
but i think u will understand...
so..... this thread is done.
BUMP IT! - JUCA.
but i think u will understand...
so..... this thread is done.
BUMP IT! - JUCA.

 09-18-2008, 07:20 PM
#12
�★ King of brake lines ★�
Thread Starter
Join Date: Jun 2008
Location: Croatia� ♥ ♥ ♣ ♠
Age: 34
Posts: 15,690
Re: Stunt bike build (for noobs)
TRICK TIPS : No1
BASIC WHEELIES : No1
The following how-to is meant for the novice stunter (NOT novice rider) on most 600+ cc modern sportbikes (although I DO NOT recommend you starting out on a 1000cc or similar extreme-power bike). While the following is most definitely not the only way to start, it is the way I learned, and, reflecting back, I feel it is the best for the beginner. I hope this helps you all out.
Two points to keep in mind when learning to Wheelie:
1. Keep things simple.
You only have so much attention, and it's best to keep it divided by as few things as possible. Usually, when a beginning student is overwhelmed with trying to perform too many unfamiliar actions all at the same time, he or she tends not to perform any of them properly. The following approach to learning will stress using the fewest number of control inputs necessary to accomplish our goal - putting the front tire in the air.
There are, essentially, three basic factors you need to control when performing a basic wheelie:
1. Acceleration (throttle control)
2. Fore/Aft weight distribution (body control)
3. Side/Side weight distribution (balance & body control)
Any late model 600+ cc sportbike that I can think of, in stock form, will easily pull the front wheel up to 12-o-clock & beyond in 1st gear if you do nothing else than keep your body motionless and slam the throttle open once in the powerband. No ****. You may think this not to be the case, but trust me, unless your bike is malfunctioning, it's just that easy. The reason most people fail is due to the fact that they unwittingly shift their weight forward. We'll get to that later. The point being - there's no need to bounce it up, there's no need to clutch it up, and there's no need to roll off & on the throttle in 1st. Most of these techniques essentially fool the rider into committing him or herself to leaning their weight back - the rebound from the fork springs is, in my opinion, negligible. And the control that some people tout the clutch as offering you can easily be had with a well-practiced throttle hand. That means there's a lot less to do and think about when you're starting out, and that means you'll be a lot more likely to succeed, and a lot less likely to get hurt. Even using these 'other' techniques, you'll still need to control your throttle, your weight distribution, & your balance. There's just no sense in adding in more complication.
2. Keep things safe.
That means finding a desolate stretch of straight road with good pavement(an old airstrip or race track would be best), wearing ALL your gear (gloves, leathers, boots, HELMET, HELMET, HELMET), having friends with cages present, and pre-ride checking your bike (tire condition & pressure, chain condition & slack, brakes, shift lever & position, etc.). It also includes using your head, thinking things through, and above all, not trying to rush your progress. There's no reason why you can't learn to roll nice wheelies without looping it. Remember - just because you know of or have watched people walk away from similar wrecks doesn't mean everyone does. The consequences of looping a hi-power sportbike are a serious matter.
Now - since I'm going to recommend starting out rolling first gear wheelies, let's address a few concerns.
Gearing and Gear Selection:
To begin with - you won't need to gear your bike down. Like mentioned above - in stock form - most any modern 600+ sportbike needs nothing more, in first gear, than for you to not use your body-weight to screw things up. So do not throw a bigger sprocket in the back or a smaller one up front if you can't get it up in first. It's your fault, not the bike. You're only making things more dangerous for yourself once you finally do stifle your survival instincts long enough to let the wheel come up. Next - there's the issue of 1st gear being too twitchy. Well - for the experienced wheelie expert, 1st gear can be rather dangerous, since the balance point (the vertical point where you have to hang the front wheel to keep the bike from accelerating), is so high, and 1st gear does offer up alot of torque. But for the beginner, who will inevitably slam the throttle shut the minute the front tire comes off the ground, it's not really an issue. And trust me - even as quickly as the front wheel can come off the ground in 1st, it's no match for your reflexes, unless you've just chased a few percosets down with a pint of Jack Daniels. The fact is - once you get 2nd gear & higher wheelies up past midway point (and past the point where you need a lot of torque), they want to come up and over a lot faster than 1st gear wheelies do, since the gearing is higher. Also - 1st gear offers up tons of immediate engine braking. That means that as soon as you let off of the throttle, the engine braking effect literally sucks the front wheel back down to earth. This will work for you even if you are unfortunate enough to end up going past 12-o-clock. While this effect is apparent in all gears, it is much more so in 1st, and seems to take effect 'right away' in 2nd, particularly, there seems to be a sort of 'time lag' before it kicks in. The main reason I like first gear is that it offers the power necessary to bring the bike up while doing nothing more than maintaining a static body positioning and controlling the throttle. It allows you to free your mind and allow you to concentrate on throttle control, height control, and balance. It doesn't force you to make extreme body motions (throwing your weight back) which, when coupled with everything else, could definitely loop you quickly. In other words, I feel 1st gear to absolutely be the safest gear to learn in.
Use of the rear brake:
This is a controversial issue. Many advocate it's use as another tool that one can use to avoid a loop (which, if used properly, it is); others doubt it's ever going to get used by beginners until it's too late. My feelings on the subject are mixed. Most people don't rear brake very much at all during normal, everyday riding. Because of this, the use of the rear brake would definitely not be instinctive when trying to save a wheelie gone bad. If you do regularly use both the front & rear brakes, you might want to keep that thought in the back of your mind as a last-ditch save attempt. The thing that worries me most about the rear brake, however, is that even if it is used in time, it is very likely going to be used in panic, which could easily lead to a wreck just as bad as if the bike had simply looped over backwards. I feel that the use of engine braking (a passive safety feature) to pull down 1st gear wheelies is safer, and of course, much easier, since all you have to do is let off on the throttle. Finally, especially if you don't use the rear brake consistently, but even if you do, keeping it 'in mind' does use up some concentration that could be spent elsewhere. So - think about the issue, and make your own decisions on this one.
Use of the Clutch
This has already been covered, but I want to say it again. For first gear wheelies, do not use the clutch - you don't have to. Sure - you can use the clutch to feather the power in and control your height, but this is also something you can do equally as well with the throttle, with less wear & tear on your bike, and most importantly, while spending A LOT less concentration. The only reason I would change my opinion on this point is if you're coming from a dirtbiking background where you're already WAY familiar with the use of the clutch - where it's become instinctive. Otherwise - I say don't use it yet.
09-18-2008, 07:27 PM
#13
�★ King of brake lines ★�
Thread Starter
Join Date: Jun 2008
Location: Croatia� ♥ ♥ ♣ ♠
Age: 34
Posts: 15,690
Re: Stunt bike build (for noobs)
TRICK TIPS : No2
BASIC WHEELIES : No2 (PART 2)
OK - Time to Pull Your First Wheelies!
So - with all these points in mind, you're ready to start. You have all your gear on, you're on a safe, modern sportbike (it could be any bike, but this tutorial only applies to modern sportbikes), you're on a safe road, and you have buddies standing by to help you if things go bad. Start out on your bike looking down a long stretch of open space. Sit as you normally would on it - you might want to sit a little further back on the seat if you sit WAY forward during normal riding (like I do), but you don't have to go to any extremes. What you do want to do is to make sure to support your body with your stomach & back, rather than with your hands resting heavy on the bars. This is the way you should ride anyway, but is especially important for making wheelies. You want to lock your legs down on the bike so that, as she starts to come up, you don't pull back on the bars to 'hold on', which could possibly cause you to open up the gas more than you want to. Also - you need to be loose on the bars to be able to modulate the throttle (though this will come later). Essentially - you want your hands, your throttle hand especially, free to move without supporting your body weight, and this can only be accomplished, at least starting out, if you're anchored down on your bike using your legs & torso. As you progress and gain more experience, you can always loosen up a bit on the bike later. But for starting out - stay locked down & keep your arms loose.
Now, start tooling down the road, in 1st gear, up until you reach the powerband, which will be anywhere from 4-8K, depending on your bike. I don't look at the tach when pulling up, and you shouldn't either. It's just one more thing to detract your attention that could better be spent elsewhere. You'll be able to feel the power coming in. Anyway - once you do feel yourself getting into the powerband, do only one thing - and this is important - ONLY ONE THING. Open up the throttle quickly to full blast. Do not move your upper body forward, do not move it back. Do not shift your hips. Be a robot - just move your wrist! If you're in the meat of the powerband, and you didn't subconciously shift your weight forward - the front wheel just came up! I guarantee it! And if it didn't, read back through this paragraph, think about not moving your body, and try again, possibly at a slightly higher RPM. Rinse & repeat.
OK - Time to evaluate your first wheelie:
If you got the wheel up, contratulations!!!! But - you probably set it right back down. Don't worry about it - this is natural. You probably either cut the throttle, shifted your weight forward as you felt the front end come up, or, most likely, a combination of both. But - you learned something for yourself. You learned that the bike WILL come up on it's own. You learned that, at this point, you don't have to do anything other than open the throttle at the right time to make it happen. Now it's time to start thinking about how to keep the wheel up a little longer, and get it a little higher. Let's first think about what would happen if you just kept things the way they were - you didn't move your body, and you kept the throttle pinned. What do you think would happen? That's right - you would loop it! But what would it feel like? Well - It would 'feel' like an exponential curve: The first 3rd or so of wheel lift would proceed relatively slowly (though it won't feel that way to you!) The second third would go quite a bit faster, and the toeepp third will be - well - you wouldn't know what hit you! Now - what if you kept everything else the same - kept your body stationary, but just started to roll the throttle off a bit once you got past the 1st third of travel? One of three things would happen here - you would either roll off too much & drop back down, roll on not enough and keep ascending, or roll off just the right amount and, for a very brief time, stay put at that height. Because the bike is still accelerating (& therefore making more power), you can't just hit this magic point at this relatively low height & hold it. But you can stay there momentarily. And you can learn, through practice and experience, to roll on/off the throttle to maintain, increase, and decrease your height. And that's exactly what you need to go out and do now - practice holding your wheelies up a bit.
Practice adding distance
OK - You're back out on your safe road, with your safe bike, your safe gear, & your safety net of friends. Start out first as before - just pulling up little 'popa' wheelies to get the feel of things. Once your comfy - it's time to try to add some distance & height. There really isn't very much to explain here - it's mostly a matter of practice and experience. But basically, you want to try to start letting off the gas slowly, rather than slamming it shut, as the wheel comes up. Be prepared to spend a lot of time perfecting things. This is really all a matter of feel. Trust me - if you put some real time into this, you will learn to roll on and off the throttle in order to keep the front wheel somewhere in the air until your bike runs up against the rev limiter. Of course, how quickly your bike revs out is determined by the height of your front wheel. As you approach the balance point (described above), the engine will accelerate less quickly. If you reach the balance point, it will stop accelerating entirely. Let me state, for the record, that I DO NOT recommend trying to ride 1st gear balance point wheelies when just starting out. But - as your height increases, you will be able to ride out longer & longer wheelies. It's just that simple. And - as you practice, you wll find yourself getting higher and higher. It's just a matter of gaining comfort, which will come in time. Take things very slowly, adding in, through multiple practice sessions, a little more height and a little more distance, but no more than you're comfortable with, each time. If you're interested in how high you're going, it often times helps to have yourself video-taped. It also helps, once you are comfortable managing your height and have some free attention to spare, to glance down at the tach and see how fast you're still accelerating. Remember - as your height increases, your acceleration will decrease.
I mention running up against the rev limiter a lot, only because, if you do nothing other than maintain a non-balance-point height, and you keep the wheel in the air, you will inevitably run up against it, causing you and your bike to come crashing down to earth in a bone-jarring (& sometimes bike damaging) manner. And - starting out - you are almost guaranteed to hit it at least a few times. But this is definitely something that you want to avoid. So - at the same time that you are trying to modulate the throttle to bring her up controllably, you want to practice monitoring your speed (via engine noise and/or watching the tach), and attempt to start rolling off the throttle before you hit the rev limiter. You also want to start practicing rolling back into the throttle as the descent occurs in order to soften your landings. All of these things, as mentioned above, will come with time and practice. There is no other substitute.
Advanced (for a beginner) Techniques
So after a lot of practice and hard work, you're now consistently pulling up first gear wheelies, to a descent height, under power alone, and holding them until just before the bike peaks out. Now where can you go from here? There are a number of things you may want to work on. You may want to work on leaning your body back now, which can help bring up your wheel quicker, at lower RPM, and therefore allow you to ride out your wheelies for longer time & distance. This is good practice for 2nd gear power wheelies, where you'll have to use some body english to pull them up. You can practice using the clutch to pull them up - once again for the same reasons - getting them up quicker, at lower speed, and rolling them longer. Once again, this is also a good intro into 2nd gear clutch wheelies. You can continue to seek higher heights, and reach the illustrious balance point - but once again be warned - the 1st gear balance point wheelie will bite you quickly if you're not careful. You can start trying to pull 2nd gear power and/or clutch wheelies, or try shifting up into 2nd gear from 1st. It's all up to you. But above all, make sure you lay down a firm, solid foundation of the basics before trying to attempt the more advanced manuevers.
09-18-2008, 07:35 PM
#14
�★ King of brake lines ★�
Thread Starter
Join Date: Jun 2008
Location: Croatia� ♥ ♥ ♣ ♠
Age: 34
Posts: 15,690
Re: Stunt bike build (for noobs)
TRICK TIPS : No3
USING THE CLUTCH :
THIS TRICK TIPS I TAKE FROM HOW TO STUNT SITE !
www.how2stunt.com THIS SITE IS AWESOME!!! ON THIS SITE YOU CANT FIND ALL TRICK TIPS ! USE IT !!!
THANKS TO " SIC NATE " AND A FEW OTHER PEOPLE FOR THIS USEFULL SITE !
- THANKS -
USING THE CLUTCH :
The Clutch is the most important part of the wheelie. This technique can be used on any type of bike....sportbike, cruiser,dirtbike, etc. The reason for the clutch technique is to get the most power out of your engine at the lowest rpm possible, so that you can have more rpm range to ride your wheelie.
THE MOST IMPORTANT THING TO REMEMBER is hand position: Your left hand grabs the handlebar and you work the clutch with ONLY your pointer finger. That gives you the most control possible. The technique is simple: Practice in 2nd gear, then move to first gear after mastering the technique. Cruise at 2000rpm, accelerate quater throttle and while accelerating slip/feather the clutch with you pointer finger. You will then hear the engine rev, the clutch will grab and you will feel the bike accelerate with more power than usual.THIS TRICK TIPS I TAKE FROM HOW TO STUNT SITE !
www.how2stunt.com THIS SITE IS AWESOME!!! ON THIS SITE YOU CANT FIND ALL TRICK TIPS ! USE IT !!!
THANKS TO " SIC NATE " AND A FEW OTHER PEOPLE FOR THIS USEFULL SITE !
- THANKS -
09-18-2008, 07:52 PM
#15
�★ King of brake lines ★�
Thread Starter
Join Date: Jun 2008
Location: Croatia� ♥ ♥ ♣ ♠
Age: 34
Posts: 15,690
Re: Stunt bike build (for noobs)
SICKINNOVATIONS NEW BAR :
It is a base that always stays on the bike and has interchangeable plates between round bar and flat. You can also buy just a replacement loop or flat bar if you ever wear them out. Nuts are welded to the back so all you need is an allen wrench and a few seconds to swap them out or just remove it and pop your taillight in for street killin.


For more info u can contact PUNKON1WHEEL (he is StuntLife member)
Or u can contact S.I (sickinnovations) on their site. www.sickinnovations.com
It is a base that always stays on the bike and has interchangeable plates between round bar and flat. You can also buy just a replacement loop or flat bar if you ever wear them out. Nuts are welded to the back so all you need is an allen wrench and a few seconds to swap them out or just remove it and pop your taillight in for street killin.
For more info u can contact PUNKON1WHEEL (he is StuntLife member)
Or u can contact S.I (sickinnovations) on their site. www.sickinnovations.com
09-18-2008, 09:21 PM
#16
�★ King of brake lines ★�
Thread Starter
Join Date: Jun 2008
Location: Croatia� ♥ ♥ ♣ ♠
Age: 34
Posts: 15,690
Re: Stunt bike build (for noobs)
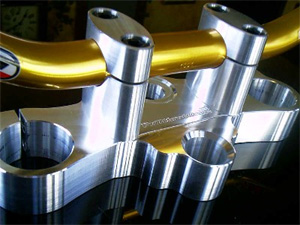
DIRT BIKE HANDLEBARS FOR YOUR BIKE :
1. You need new triple clamp.
2. U can get longer lines (handbrake line and clutc) sure you can use old lines.
Ttiple clamps :
DB handlebars :
RENTHAL :


RENTHAL DB SIZE CHART : http://www.motorcycle-superstore.com...IZE-CHART.ASPX
TAG METALS HANDLE BARS :


MOOSE :


Handlebar info :

1. You need new triple clamp.
2. U can get longer lines (handbrake line and clutc) sure you can use old lines.
Ttiple clamps :
DB handlebars :
RENTHAL :
RENTHAL DB SIZE CHART : http://www.motorcycle-superstore.com...IZE-CHART.ASPX
TAG METALS HANDLE BARS :
MOOSE :
Handlebar info :
 09-18-2008, 09:40 PM
#18
�★ King of brake lines ★�
Thread Starter
Join Date: Jun 2008
Location: Croatia� ♥ ♥ ♣ ♠
Age: 34
Posts: 15,690
Re: Stunt bike build (for noobs)
EASY PULL CLUTCH LEVERS :
MSR PRO RAPTOR :

Adjustable cable feature let you choose from 3 positions according to your clutch pull preferance and riding style.
The top position gives you increased cable pull; The middle position is the same as a standard lever assembly; the bottom position provides an easy pull (325% less effort)
The cable adjuster is an anodized pivoting regulator that is easy to adjust and eliminates cable drag in all 3 positions
PRICE : 47.00 USD
MOOSE E-Z PULL :

A simple two-position pulley allows the clutch to have an extremely easy pull.
PRICE : 43.89 USD
FTP E-Z PULL :

FTP easy pull clutch levers have been designed with 3 different settings that allows you to adjust the feeling of your clutch to suit your personal needs (Hard to Soft)
PRICE : 65.00 USD
MSR PRO RAPTOR :
Adjustable cable feature let you choose from 3 positions according to your clutch pull preferance and riding style.
The top position gives you increased cable pull; The middle position is the same as a standard lever assembly; the bottom position provides an easy pull (325% less effort)
The cable adjuster is an anodized pivoting regulator that is easy to adjust and eliminates cable drag in all 3 positions
PRICE : 47.00 USD
MOOSE E-Z PULL :
A simple two-position pulley allows the clutch to have an extremely easy pull.
PRICE : 43.89 USD
FTP E-Z PULL :
FTP easy pull clutch levers have been designed with 3 different settings that allows you to adjust the feeling of your clutch to suit your personal needs (Hard to Soft)
PRICE : 65.00 USD
Last edited by Juca; 09-18-2008 at 09:42 PM. Reason: some mistake
09-18-2008, 09:50 PM
#19
�★ King of brake lines ★�
Thread Starter
Join Date: Jun 2008
Location: Croatia� ♥ ♥ ♣ ♠
Age: 34
Posts: 15,690


